Showing posts with label project. Show all posts

Sunday, July 21, 2013

The Renovated House


It is very interesting how everything needs water to survive, yet water destroys everything! If just about anything gets wet, you have to take immediate drastic measures to attempt to salvage it… and even then most things are beyond repair. That is what we had to do following that time a pipe burst in our rented house. We literally washed every single thing we own.

I meticulously cleaned, dried, and gave excruciating individual attention to the books and records. Although most were salvaged, many no longer possess any real value. They only have the value that I personally assign to them, which itself has been greatly eroded. This whole ordeal has really driven-home just how ephemeral everything is.

The renovation
Although my landlord managed to find and employ the most inept contractors of every trade, the end-product is far better than it was before the flood. The house has been stripped down to a shell and fully renovated and restored.

Everything to do with the interior is brand new: walls, ceiling, flooring, cabinets, wiring, plumbing, lights, fixtures, and so on. The best part was that got to give a lot of input on how it was improved, optimized, and customized for what we want. So it was kind of like renovating our first house, [except it’s not our house].
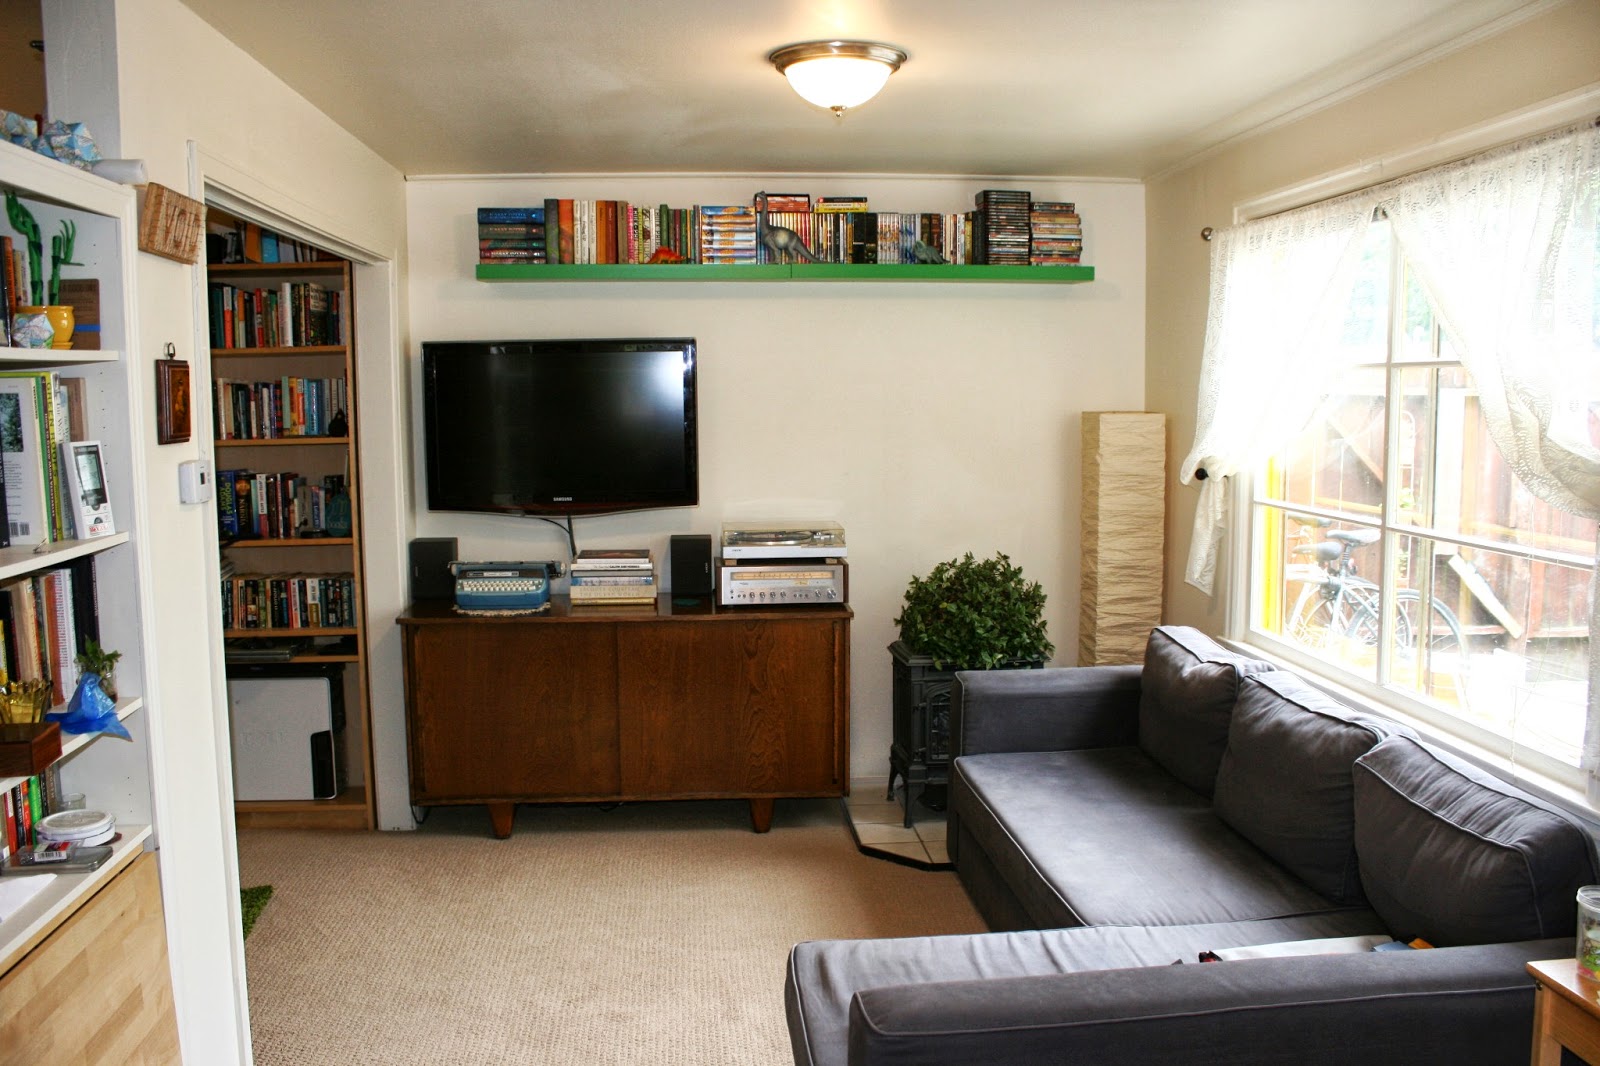
Anyway, things have been back to normal for a little while now, and this post is long overdue. Sorry to keep you all on the edge of your seat. Here is what the place looks like now. Honestly, the place is way better than it was.

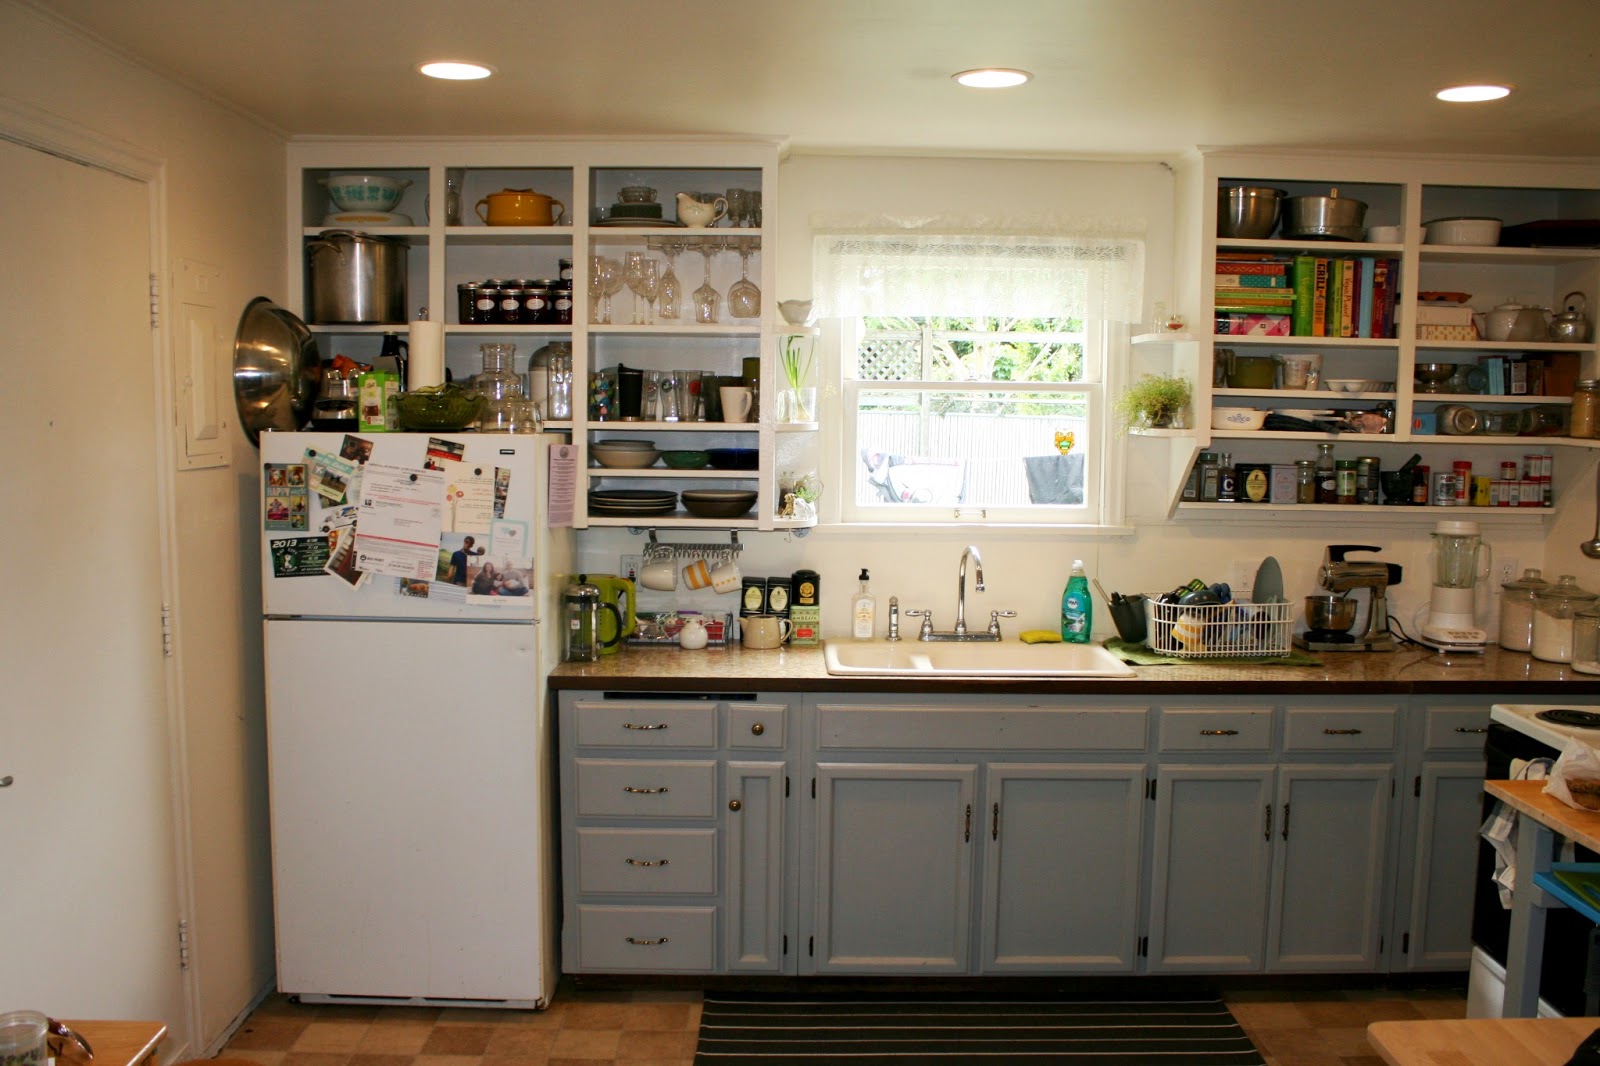
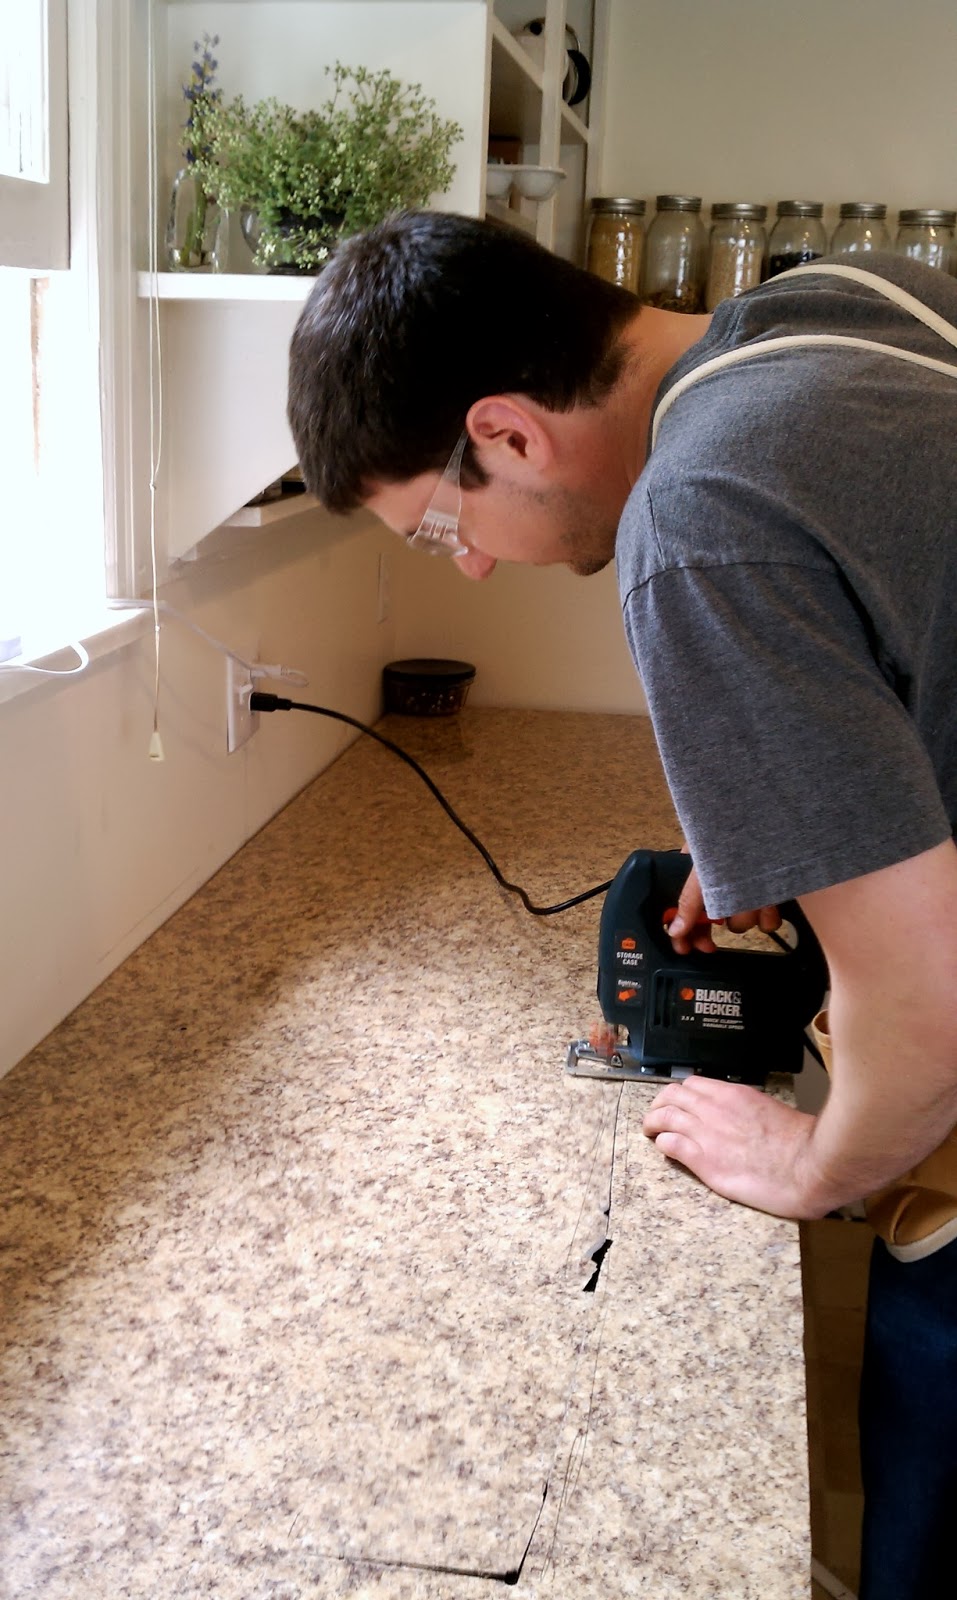
The kitchen was an overall improvement. 
You can read more about our thrift-store counter-tops here!
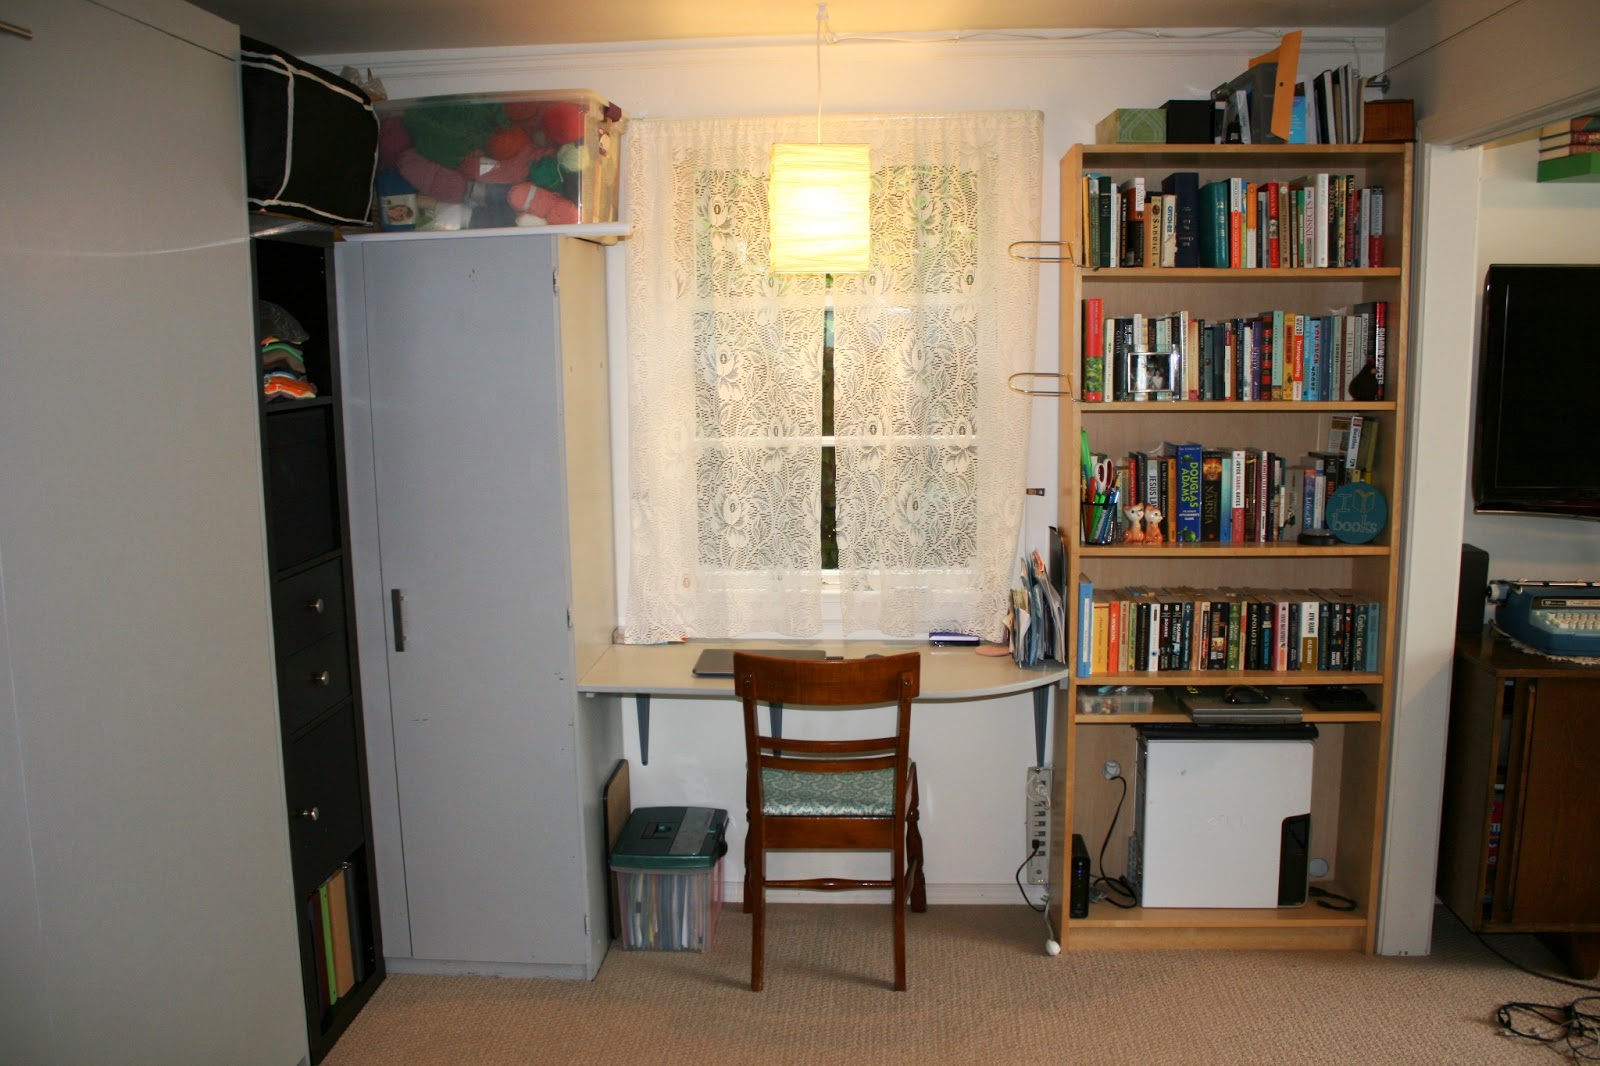
Tess and I built a Murphy bed to save precious space in our tiny house. We ordered a kit from Create-A-Bed which came with good instructions, hardware, and the essential mechanisms. We then cut the lumber and assembled, built, painted, and installed it. It turned out perfect, and we are quite proud of it.

Murphy bed down.
Murphy bed up.
Tess and I also built in a custom desk, clothes-rack, and gear closet, and incorporated shelving into the bedroom which is a huge improvement in the use of the space.

The built-in desk, that we built.
One good thing to come from all of this is we got a washer/dryer in the house now.

The Bathroom is pretty much the same.
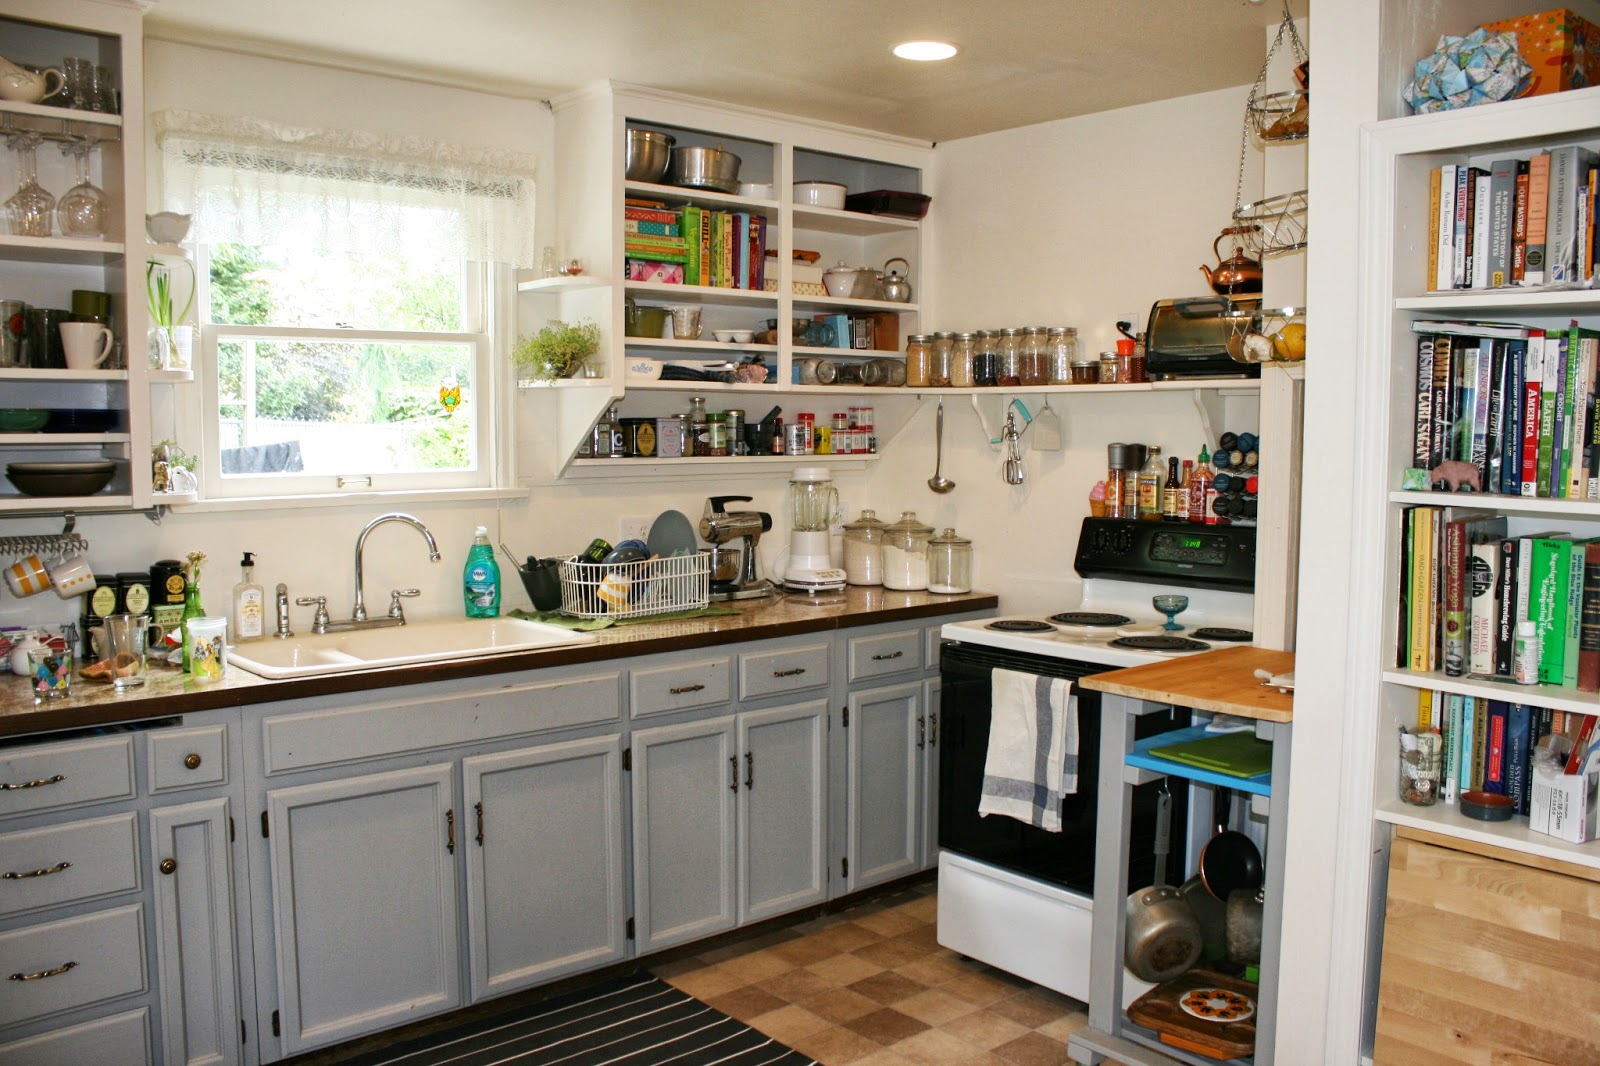
The kitchen was rearranged a bit.

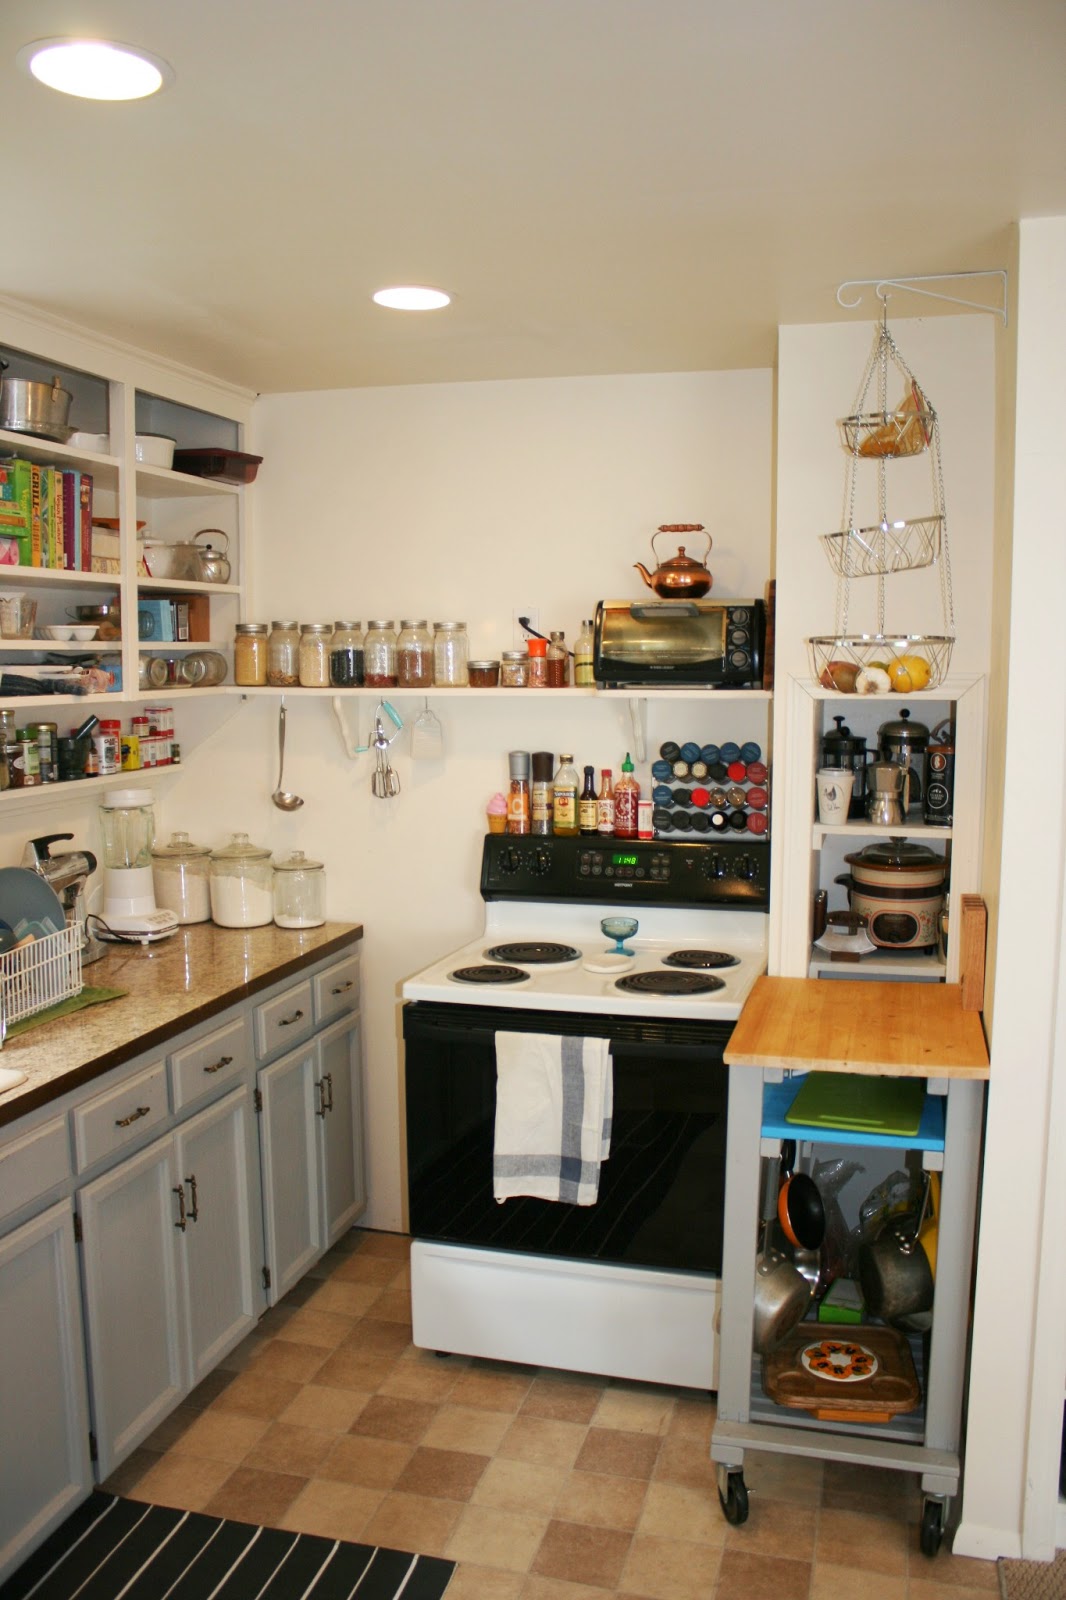
The stove was re-positioned, and the counter extended to the wall. 
Now that things are in good shape, and we are back in a livable house, I fully expect it to burn down for no good reason other than Murphy's Law. I only ask that if that happens, I am inside when it all goes down in flames. 

Monday, July 15, 2013

Recycled Kitchen Cabinets

Here is a post that I meant to post months ago... ....

After the flooding incident, the entire house was remodeled, including the kitchen. We later realized the cabinets were done with almost 100% recycled materials! This is mainly because we (and our landlord) are cheap, but if you prefer to think of it as being green, that's cool too.

Materials and their sources:

Cabinets and Sink       ->     Craigslist
Countertop Laminate  ->      Thrift Store
Drawer Handles         ->      The Re-Store
  
Our landlord had found the replacement cabinets on Craigslist and I swear they looked like were taken from a meth lab that was being renovated. I can only imagine the deal he got on this heap (likely free). But after a good cleaning, some paint, and a lot of TLC, the cabinets themselves actually turned out better than the previous ones.

Cabinets that we fixed up from total crap to pretty nice.
The counter-top needed some work.
The counter-tops however, were a different story. In the rush to get the house livable, the particleboard surface of the counter-top was not nailed down by our landlord's chosen handyman. It was actually placed on upside-down and completely backwards! The laminate counter-top was total crap: thin, cracked, chipped, not glued down, and gross. So it was a bit sub-par to prepare food upon.

Lucky for us, a good friend of ours, Matt Behring, is currently pulling a 4.0 in the Cabinetmaking and Fine Woodworking Program at The Wood Technology Center at Seattle Central Community College. It is prestigious woodworking school and he will without a doubt go on do great things. In fact he already has, with our counter-tops! 

Tess made an awesome find when she found this brand-new roll of nice counter-top laminate at the Ballard Goodwill for $12.  One man’s trash is another man’s kitchen.

Counter-top laminate from the Ballard Goodwill for $12 !
It was easy to convince Matt to help us fix and laminate the counter-tops as it is the perfect opportunity to test out his new-found skills in a real-world setting, and we couldn't be happier with the results! I was very impressed with his work, from the second he showed up looking all professional with his toolbox and shop apron, to when he put the finishing touches on the laminate and we went out for a celebratory beer.

He has the necessary tools of the trade, knows the tricks of trade, and has honed his skillset to a point where this could have easily have been his 100th  real-world install (instead of his 1st)! I enjoyed helping him help us with this project, and I learned quite a lot of useful skills in the process.

Matt fixing the particle board.

J-rolling the laminate to help the cement bond.

Rough cutting the hole for the sink.

Routing away the excess laminate. 
Note how good the final routed hole for the sink looks after being routed!

He briefly used a really awesome Japanese saw called a Dōzuki, which is a type of backsaw
It has a very thin kerf, only cuts on the back-stroke, and therefore is used for fine cuts. 
It is awesome and I really want one!

To finish up the kitchen cabinets, we got new drawer handles from the Re-Store. The Re-Store is a concept that I absolutely love. It is what you would have if you combined a thrift-store and a Home Depot. It’s a store that sells recycled and re-purposed hardware, fixtures, and building materials! Brilliant.

Cabinet and Drawer handles from the Re-Store.

I wish I had a good before picture to really drive home how much of an improvement this laminate counter-top is. But you'll just have to take my word for it; it is night and day! 

If anyone in the Seattle area needs any carpentry and/or laminate work done, I know a guy! He is professionally trained, top of his class, and is highly recommended! Thank you Matt!

The final counter-top. We love our professionally installed thrift-store find! 


Monday, June 17, 2013

There's not yet an app for that, but there's this piece of crap for that.

For just about forever I have been interested in monitoring my power usage, mainly out of curiosity, but also to manage my electricity usage. So I was pretty stoked when I found this cool thing at the thrift store for $13!  


The Black & Decker EM100B Power Monitor. 
WHOooooooaaA!


This extremely cheesy and dated video explains everything you need to know.
The opening line...is priceless.

It is pretty much a no-brainer that if most of us had real-time feedback on our electricity usage, we would use less of it. Especially true for us cheapskates. And that is exactly what this nifty gadget does!

It’s fairly easy to install. There is no wiring! You just align a sensor to a port (or the spinning disk thing) on the electric meter (depending on the era of the meter), and it sends information wirelessly to a display showing usage rate. If you program in your electricity cost, it will show you a dollar rate.


Compatible with most power meters. (Mine was the yellow one.)

Look at these features! Look at that snazzy display! haha.
In today’s world with the internet, apps, wi-fi gadgets, and (for the extremely lucky) smart-meters, this gizmo seems so archaic! Hilariously so, in fact. Just watch the video above. The mere fact that it uses that silly display, makes me laugh (as opposed to just piggy-backing onto a smartphone), and where is all my historical, searchable, beautifully-displayed, filterable, instantly-accessible data !?! Pa-leeeease. But it does do the job. This thing dates back to at least 2004-ish and used-to cost about $110 new!  If you want one, too bad, they don't sell them anymore. haha. There is 1 used one on Amazon

Being the nerd that I apparently am, I have gotten overly excited about several similar (and more advanced) services in the recent past. These include: Google PowerMeter (now deprecated), Opower (which has completely evolved away from being the power monitoring app I wanted it to be), and Nest: the learning thermostat.  All really interesting energy-usage feedback technologies.

This thing will probably push me to move into investing in solar, which is another dream of mine, but until I have a smart-meter and solar panels, when I am selling electricity back to the electric company, this gizmo will have to suffice. 

Anyway, I don't know if it will affect my energy usage or not, but it is cool (and a little painful) to see how it jumps up when the fridge kicks on or when we start cooking dinner. 

Sunday, January 6, 2013

Reupholstering a Rocking Chair


Tess and I have had our eye on rocking chairs as they show up at our neighborhood Goodwill, but have resisted the impulse since we have no room for furniture in our house. haha. Well we finally gave into the urge for this steal-of-a-deal. We bought it for a whopping $15 with the intention of making a project of it. We then dropped about $25 on supplies at JoAnns Fabrics to fix it up.

We chose a blue canvas fabric because I vetoed all floral patterns (this ain’t your grandma’s rocking chair!), and all “modern” patterns are too busy with dots and lines.

What is funny is that we picked a color that we thought matched our couch, but when we got back it became apparent just how far off it was. 

It’s interesting how bad our perception of the world around us can differ from reality… 
even for something which we sit on every day!

It is structurally in great shape. It has some worn edges from being rocked into things. The upholstery was a hideous mess and the padding consisted of what looked like a rat’s nest of straw.

I removed all the old fabric and padding in an archaeological dig which revealed that someone had previously made a sloppy attempt to cover up the original fabric.

The coil springs aren’t yet sprung and still have some spring in them, but needed to be retied in place.
I found some useful websites on how to tie the springs in place. It’s fairly straightforward. Here are some nice how-to’s on upholstering, upholstering, and tying coil springs.We didn’t really follow any of these exactly. We got the general idea and used common sense to make it work for our chair. It turned out comfortable and looks pretty good, so I think it all worked out.


I put burlap across the springs for several reasons which I thought made sense: to provide a uniform taut surface to distribute the load, keep the foam pad from sinking into the spaces around the springs and to provide some protection to the foam pad so it doesn’t get eaten by the springs.

I staple-gunned the burlap to wooden frame with a layer of paperboard from the recycle bin. This cardboard helps provide some protection to the burlap from the staples (since the springs are pushing up on the burlap). One day future archaeologists will dissemble this chair and find instructions for cooking a cardboard pizza on the back of paperboard strips. J

Tacking the canvass to the frame was very tedious. These decorative tacks look nice, but are annoying to work with. It takes patience and a lot of extra tacks…

So anyway, there you have it. Not perfect, but I’m impressed at how well it turned out. Overall it was a fun project. And now we have a chair that totally rocks!


Monday, February 27, 2012

New Kitchen Shelves


When we returned from our Christmas trip in Colorado we had unanticipated cargo. Tess’ Dad bestowed upon us the privilege of first dibs on his pile of misfit tools.  It could quite possibly be the most practical, useful, and best (unexpected) Christmas present ever.

When we got home I got right down to cleaning up the tools to a new luster. I turned our small shed into the workshop space I have always wanted, complete with tabletop space and a vice(!), and we got to work! It couldn't have come at a better time, as we have projects lining up. Tess and I love to build custom furniture and we have had a few ideas in mind since we moved in.

First on the list was this awkward space in the kitchen where we had a cheap metal shelf.

  We came up with an idea for custom shelves and made it happen.

Here is the finished product!


And this is what the full corner looks like now. (We put up the pot rack too.)


Stay tuned for future projects!